

The window Air Conditioner is an invaluable asset to the house during hot summer months. Most people will buy their preferred window AC and expect that life will continue to be good for well, a long time.
But the sad reality is that our everyday life is full of unforeseen circumstances, and one day you might come home to find your precious Window AC leaking all over your floor or outside on your lawn or backyard.
Certainly, this is not a good indicator of your AC's general health and well-being, but it is also in your best interest to not panic too much.
Homeowners all around the world have had to face off against a leaking window AC at least once in its years of operation, and it can be dealt with easily if you have the time and patience for it. In other words- yes, you can DIY repair your AC without calling in any HVAC pro.
Before you proceed, however, make sure that the leaking is not of alarmingly excessive nature- as that can be a problem you really need a qualified technician for.
But if you’re only working with some light drippage and leaking of a few drops here and there that has the potential to affect your walls and furniture, you can apply your natural expertise and intuition to the job.
Things To Do Before Operating A Leaking Window AC
Safety first. Before you begin tampering with any part of the unit that looks like it needs to be supervised, ensure that you’ve taken the basic precautions. Things such as switching off the unit, cleaning up the leakage and any water visible to you on the surface of the AC, etc.
Once you are sure that you are in the no-harm zone, you can begin investigating the situation by locating the source of the water. This is the part of the process where you need to work based on some knowledge.
Once you can identify where the leak is taking place, you can focus on repairing that part as needed. This guide aims to enrich you with such knowledge, as we cover the different problem areas in your AC unit that may be contributing to any water leaks. Easy fixes to help resolve these issues are also included.
How Does The Window AC unit store water?
Before we delve into the world of AC water leaks, it helps to know where this water comes from in the first place. Your Window AC unit not only lowers the temperature but also works towards removing humidity from the air and reducing the clamminess and stickiness of it.
The hot air, that is absorbed, blows over the cold evaporator coils, which extract moisture from it. The condensed water or moisture lands on the condensate pan, after which it is transported to the drainpipe through which it is disposed of.
At an optimal condition, your AC should be running this process smoothly. If not, this manifests in a water leak.
Window AC Water leakage: Causes and Solutions
In this section, we examine some of the most frequent factors that contribute to water leakages in Window AC units.
Check Condensation Drain Blockage
This is undoubtedly a popular cause attributed to the water leakage phenomenon. The first sign of this situation is that the water leak is on the inside unit of the system rather than the outdoor unit.
This means that long-term build-up of this problem can have some really incriminating effects on your floors, walls, carpets, and furniture.
The Condensation Drain blockage system has to do with the drain pan or drain pipe, which helps in getting rid of moisture gathered in the condensation pan of your unit. The condensation drain allows for this moisture to the drainpipe, from where it is permanently discarded.
The issue lies in the condensation drain, which might be experiencing some blockage from materials like dust, debris, mold, and so on.
As a result, the water is not allowed to exit from the condensate pan. And as the AC continues working, there is an excess of water collected there. As a result, the condensate pan starts leaking.
Fixing this issue has and requires only one solution: to clear the condensation drain. This can be done easily.
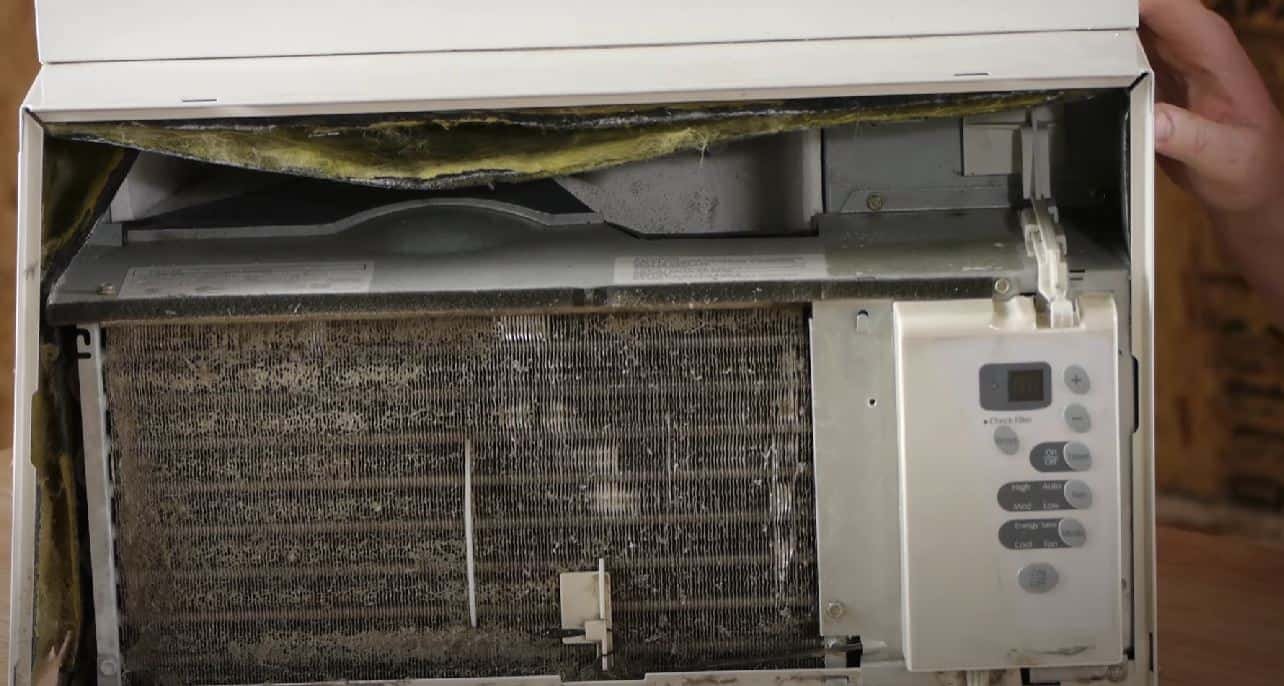
If you open up the backside of your AC, you should be able to find and clean your blocked condensation drain through a needle or a screwdriver. You only need to insert the needle into the pipe and scrape off any dirt you incur.
Check For Frozen Evaporator Coil

Another common reason for water leakage from your AC unit is the presence of frozen evaporator coils. Now, I’d like you to think back to the last time you cleaned or replaced your AC filters.
If it’s been a month too long since- that’s what’s gotten you into today’s predicament. You see, air filters do the job of keeping dust and debris out and letting the hot air from outside in. As a result, any dirt caught can remain clogged up in the filter until it is changed or washed.
In turn, a major blockage in the air filter can stop the required hot air from reaching the inside of your Window AC unit. This largely affects the cold refrigerant liquid, which depends on these air filters to let in air from which it can borrow heat.
When refrigerant coils don’t get the required heat, they freeze over due to their own low temperatures. It is the final melting of this now iced-up liquid that causes it to melt and leak water.
Naturally, you’ve got to tackle the problem at its root and deal directly with the air filters. However, make sure that you wait until the frozen evaporator coil melts completely before cleaning up the mess.
You can place a bucket under your AC to prevent further damage to your home. Finally, make the right call and replace your air filters with new ones immediately.
Check Malfunctioning Condensate Pump
The Malfunctioning Condensate Pump is of concern to those homeowners with AC systems that have below ground level parts.
Some units have a ‘Condensate Pump’ in place of a drainpipe, that carries all excess moisture from the condensate (located below ground) upwards and disposes of it outside (above ground level).
There are forces of Gravity at play here. Naturally, condensate pumps can malfunction and fail to send the water upwards as required, resulting in an overflow and a leak.
The most likely solution here is to replace the condensate pump entirely. This isn’t a problem that can be fixed all by yourself, and you might be better off with a professional’s opinion on what your next step in the process of resolving this issue should be.
Check For Damaged Condensate Pan
Another complication frequently arising with regard to water leakage is that the Condensate Pan on your AC may be damaged.
The Condensate Pan is that part of your AC that receives all the tedious and clammy moisture from your home, and drains it all outside, successfully eliminating heat from your room.
However, the condensate pan is subject to wear and tear, especially so with those AC units that have aged. You might find a hole in your Condensate pan or some sort of corroding happening. This results in inefficient disposing of moisture, which can then take the place of a leak.
While you can try to repair this issue by using glue or any such material to hold the pan together, it is not the most effective. Replacing it with a new condensate pan seems like a reasonable thing to do, as these parts are available for cheap prices in hardware and online stores.
Check For Disconnected Drain Pipe
When you notice water leaking from your AC, it might do well to first ensure that the Drain system is in place and hasn’t been accidentally disconnected.
You might find a misplaced drain pipe in newly installed or repaired systems. The result, of course, is that water starts leaking all over your floors instead of flowing through the pipe.
If you find that your unit indeed has a disconnected drain pipe, bring in an HVAC professional or technician to reinstall your system.
Check Your Refrigerant Level
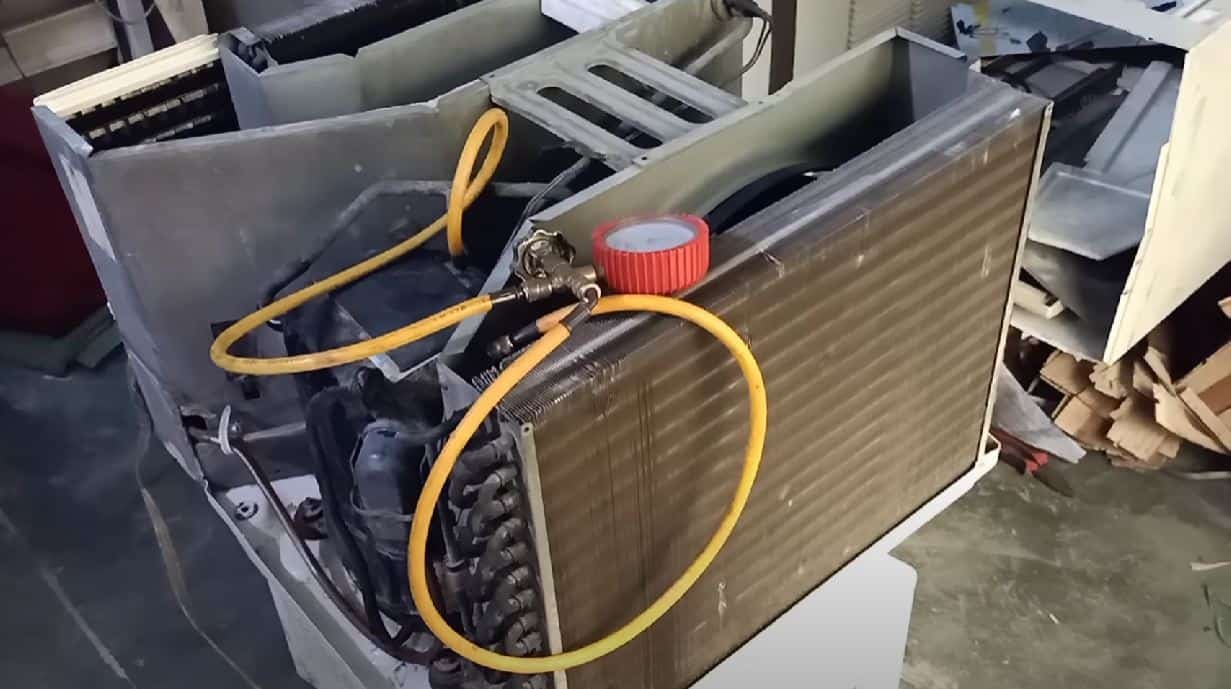
The refrigerant liquid inside your AC unit is a big handle on the air pressure in the internal parts of your system. Typically, the unit operates at a higher internal pressure so as to keep the evaporator coils from freezing due to the refrigerant’s low temperatures.
However, this might all backfire if your AC has low levels of refrigerant. When the refrigerant inside your AC is not enough, it causes a drop in the air pressure. The evaporator coils start to freeze, melt and take the form of a water leak.
Ensure that your refrigerant levels are kept up at all times, as this contributes greatly to the correct maintenance of your AC.
Problems in Installation
Lastly, any manner of installation that is not done per standard can tamper with the functioning of your AC. This can refer to disproportionally fitted drain pipes, or loosely clasped brackets and rails, or a lack of tilted angle in the installed unit, and so on.
For instance, tilting the AC slightly backward ensures that all water flows towards the back of the unit and flows seamlessly into the drainage system.
Negligence in the installation of your AC can cause big problems throughout the life of your AC, and if you notice this problem- you must immediately get your unit re-installed to save yourself extra repairs and replacements in the future.
Your Window AC is meant to support you through the highs and lows of the seasons, so it is of utmost importance that it works in good condition.
A leaking AC unit can not only hinder you but also have an adverse effect on the internal components of your air conditioner, as they are being exposed to water. With easy and quick solutions available readily, it shouldn’t be too complicated to bring your AC up to speed.
How to Fix A Leaking window AC unit?
Before you try to get handsy with your AC and try to fix the problem right away, stop. It might be more helpful to consider the root of the problem so that you avoid running into this problem again.
It's important to know what kind of a leak you're fighting with- is it just a sudden leak that has been happening over the week, or is it something that has been building up for years? Some AC units tend to leak seasonally, for instance, during the monsoon days.
If you're not careful dealing with your ACs leakage, it might really damage your floors and furniture. Moreover, consider if the placement of your AC might be a problem itself.
STEP 1: Take a look at the Drain Hole
Before we tell you what to do with regards to the drain hole at the back of your AC unit, here's what you should NOT do: Don't drill a new drain hole at the bottom of your AC unit to help the drainage process happen smoother.
We're giving this warning because you'll find lots of people on the internet misdirecting you to this solution. However, drilling a second hole might do more harm than good, as you could strike another AC part or damage the Freon Line.
However, the drain hole is still one of the first places to check when you're faced with a leaking AC. This is because, if your drain hole is clogged by dust and debris, it might not allow the water to flow outside as it should.
So, instead, you'll find the water leaking on your carpets. This is a very likely scenario as drain holes are also very likely to develop mold, and without regular cleaning, they might promptly get blocked up.
The simple solution would be to clear out the drain hole, or simply unplug it if your AC has a slinger system or a drain plug- this will let all the water out and stop the unit from leaking.
Step 2: Check For Improper Installation
A small directional mistake during the installation process could lead to problematic leaks in your system later on. This especially may be the case if you've installed your AC unit yourself, instead of taking the help of a professional.
It's possible that you might have missed out on this small but very crucial direction. All Window AC units are required to be tilted slightly backward to a degree.
This allows the water to be drained to flow more easily into the drain hole, from where it will flow out. However, if a simple glance at your AC tells you that this is missing in your AC, the problem lies in the installation.
Sometimes, your AC might naturally revert from a backward tilt to a normal degree over time because of loosening up of the support brackets, etc.
In these cases, the best solution would be to call in a professional technician to right your unit and make the draining system efficient. You can refer to your model's user manual to find out the angle at which your AC is to be tilted- it might vary for different models.
Whether this is a result of an initial improper installation or a small mistake that occurred while you were moving the AC to another room, an AC without a slight backward tilt will mess with the drainage process and cause the unit to leak.
Step 3: Cleaning the filter
This might seem completely disconnected from the problem- but we've seen many users over the years claim that a good, thorough cleaning can fix a leaking problem.
With regard to the filter, which catches dirt and dust, and hence, can get filthy quite easily. A dirty air filter can give rise to a number of problems in your AC, it can mess with the air quality, and also the cooling process of the AC.
By not letting proper ventilation happen, it can damage the internal parts of the AC as well. This is why cleaning your air filter could be the first step to fixing your leaking problems.
Related Articles You May Like